From Lab to Cloud - Microsoft Entra Connect explained: Syncing On-Premises AD to the Cloud
Azure AD connect. Now the journey to the cloud begins..
Sections
Section 7.1 IntroductionSection 7.2 Microsoft Entra Connect- What is it?
Section 7.3 Microsoft Entra Connect - Why we use it?
Section 7.4 Microsoft Entra Connect Time to set this up (Tutorial)
Section 7.5 Video tutorial Section 7.6 Final Words
Section 7.1 Introduction
Azure AD , a wonder on it's own. This is the main thing that will make the magic between syncing our lab setup to the cloud (aka Azure). I will keep the introduction brief and simple, this blog will mainly cover the fundamentals of Azure AD cloud and ultimately deploy this in the lab environment.
Should be easy right?
Section 7.2 Microsoft Entra connect - What is it?
Azure AD connect, well what is Azure AD connect. If we go on Microsoft's website and find the definition of this, the below shows up
Microsoft Entra Connect is an on-premises Microsoft application designed to meet and accomplish your hybrid identity goals. (Microsoft 2025)
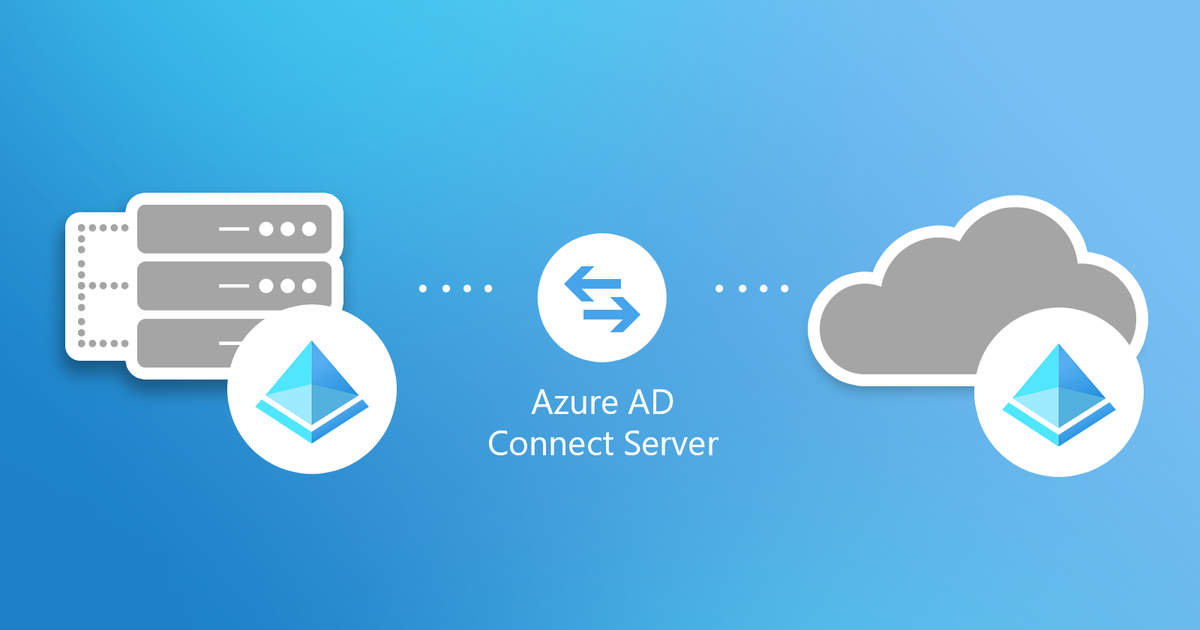
That definition is a more advanced definition. But the more simpler definition of Entra connect is that it is a tool that synchronises your on-premise architecture to your cloud environment creating an hybrid architecture. In simple words, this means that everything your Active directory users and computers application such as user accounts, groups and other objects will all be synchronized and placed on the Azure portal.
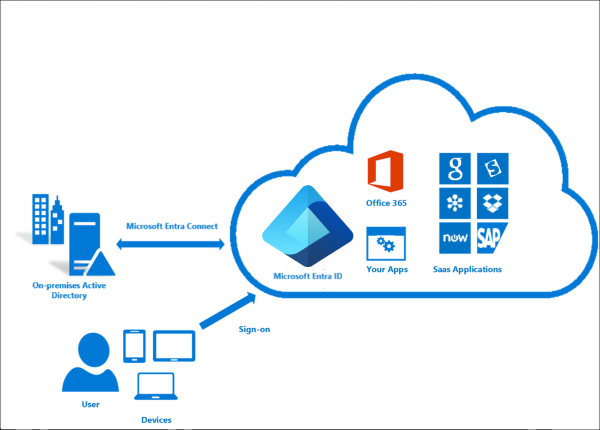
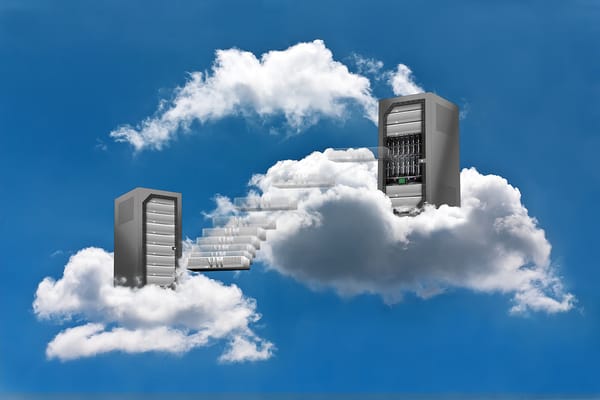
This image kind of shows an illustration how this tends to work with Entra connect allowing communication to happen with the cloud. I will now break some definitions down.
On-premise v Hybrid v Cloud
Breaking the definitions down bit by bit here. we. go
On-premise - On-premise is a simple one to go over and it is the concept of hosting all your infrastructure and hardware on site. For example the DC (Domain controller) we setup is an example of On-premise hardware as we are maintaining most of the hardware and infrastructure behind it
Hybrid - Now a different concept. Hybrid brings out the best of two worlds which is On-premise and Cloud services. In this case it involves the concept of integrating cloud architecture and on premise architecture. To expand further, this means that some services are hosted on premise while others are hosted on the cloud. This means it is a hybrid setup aka the best of both worlds.
Cloud - You have probably guessed this one, the definition of cloud architecture is when all services are handled by the cloud. This means Azure or AWS will handle all the infrastructure and services that will be used by your company. In this case, cloud infrastructure mainly helps smaller to medium size businesses as everything is more simpler to handle. But there have been signs of more companies transitioning to a more hybrid and even cloud only infrastructure.
Section 7.3 Microsoft Entra Connect - Why we use it?
Now the explanation has been done, that begs the question
Why do we use Entra Connect?
Entra connect was created was created for one purpose only and that is to synchronise on premise with Entra ID (Entra ID is Active directory on Azure).
Simplistic reason why Entra connect is needed as it provides a gateway to allow your on premise resources to be transported and displayed on Azure. There are certain features of Entra I will go over as short as possible.
Microsoft Entra Features
Password hash synchronisation - Sign in method that synchronises a hash of the user on-premise AD password with Entra ID. This means the on-premise AD password will be synced with Azure AD.
Pass-through authentication - Sign in method allows users that allows users to use same on premise password in the cloud. Works with password hash synchronisation.
Federation integration - Federation is optional and can be used to configure a hybrid environment using an on-premise AD FS infrastructure (I will not be using this feature in our lab)
Synchronisation - Responsible for creating users, groups and other objects and making sure that the identity information for your on-premise users and groups is matching the cloud. Also works with password hash synchronisation.
Health monitoring - Entra connect can provide monitoring information and you can view this in the Azure portal.
Short and sweet. In this lab, I will use Entra connect to synchronise the DC (Domain controller) with the Azure environment. So let's go to the next section.
Section 7.4 Microsoft Entra Connect Time to set this up (Tutorial)
Now it is time to set this shi up.
Step 1 - Finding the Entra Connect Installer
First stage is to find the Entra connect installer. Should be easy right but it seems as Microsoft has changed the way that this can be found.
Original way
The original way was to go to this website and download this through here - https://www.microsoft.com/en-us/download/details.aspx?id=47594
Unfortunately, everytime you press download, a PDF gets downloaded called DecomissionDownloadCentre.pdf which explains that you need to go to the Entra admin center and download the installer from there which is known as the new way.
The new method
Time to discuss the new method to download this installer. Go to Entra.microsoft.com and then sign in with the domain login (mines is ShamasI470@Labtest.onmicrosoft.com).
Then once signed in, search for Entra connect get started and this should open up a get started screen.
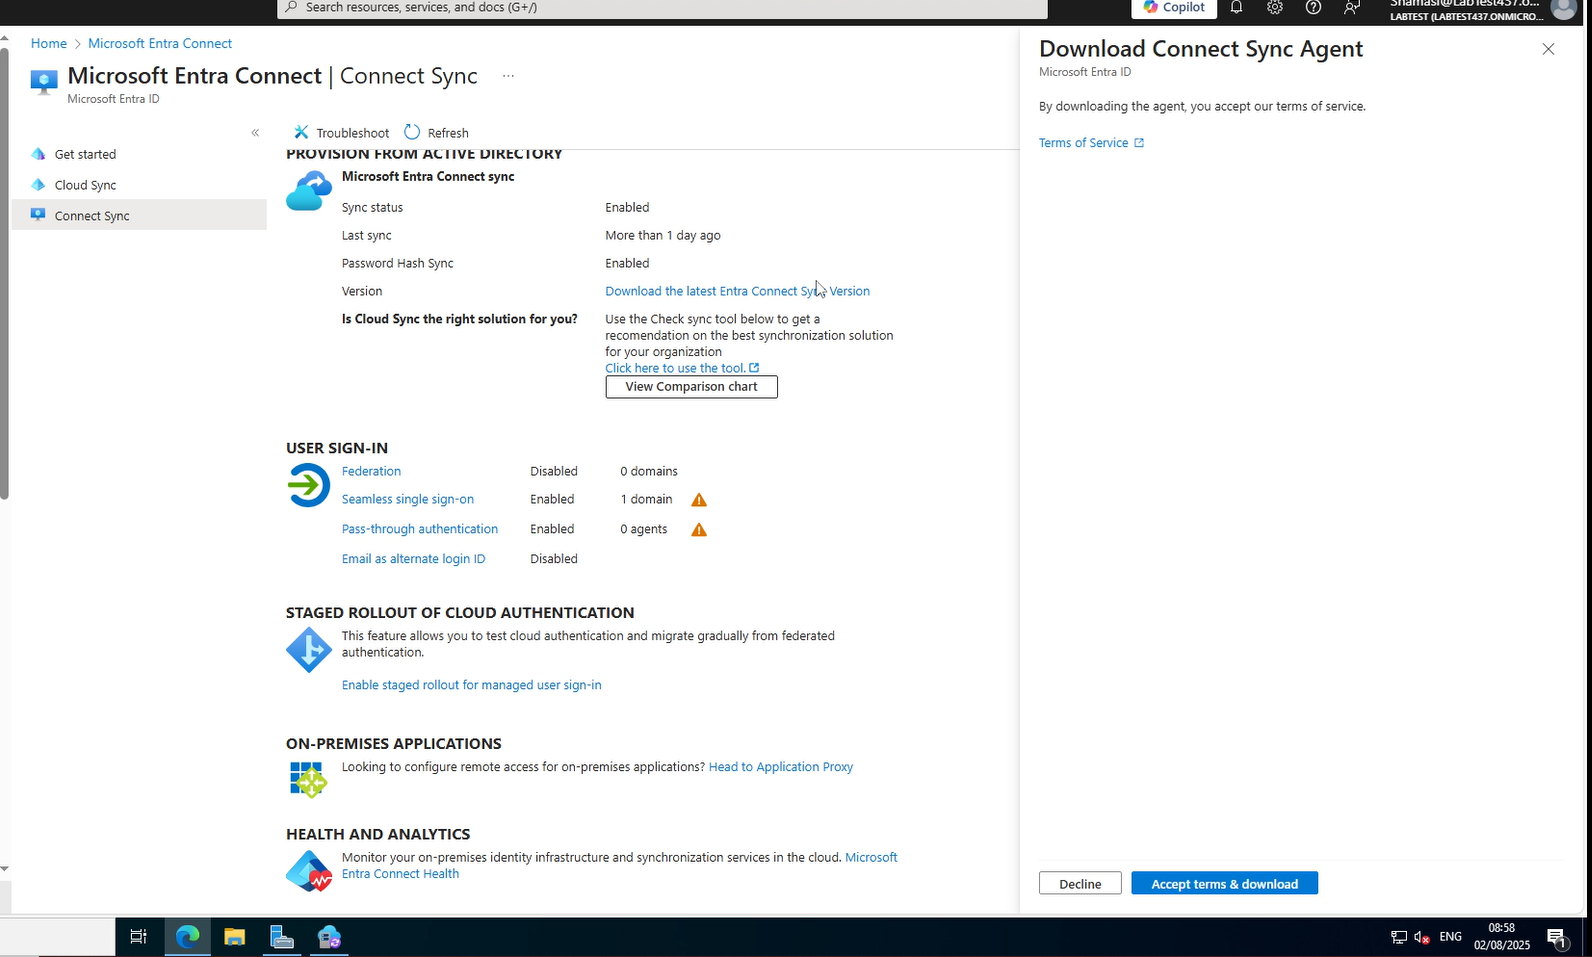
Then press connect sync and download the Entra connect sync version and press Accept terms and download.
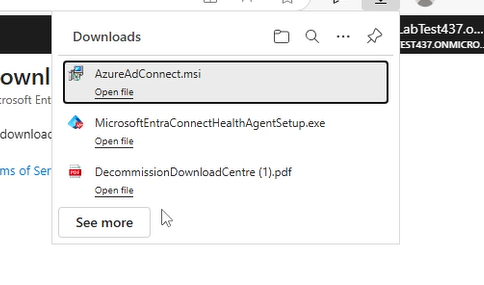
This should download the AzureADConnect.msi file for you on your VM and you can then run the installer to download the necessary components.
Step 2 - Starting the Installation process
Now time for Step 2 which is installing and configuring Entra connect to use.
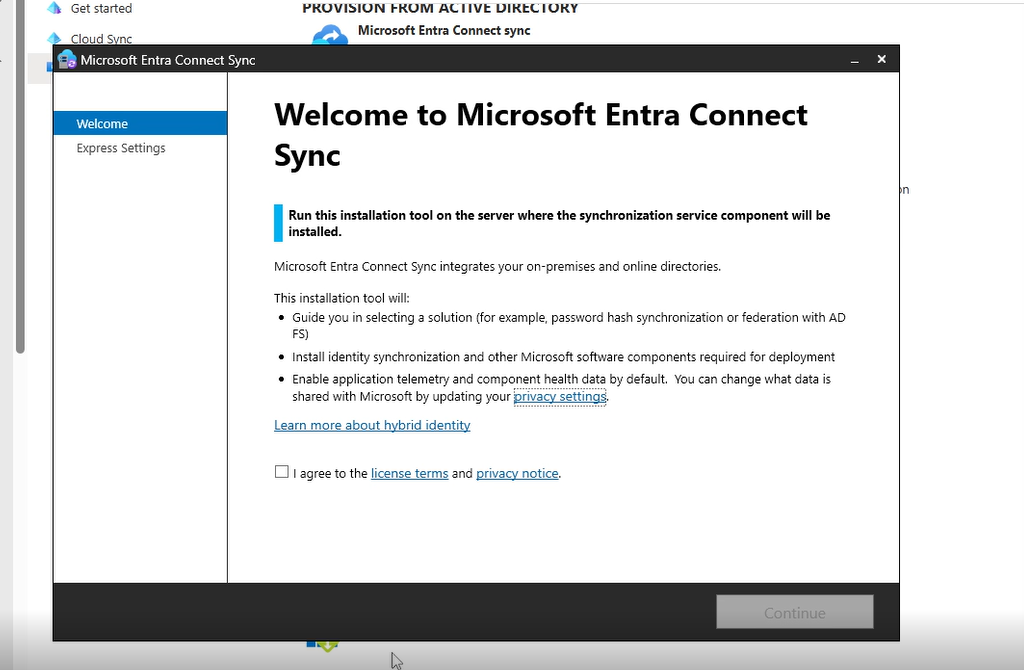
Entra connect window should show up once the pre-requisites have been installed. The window should look like the above, press I agree and then press next.
Step 3 - Entering your Azure tenant account
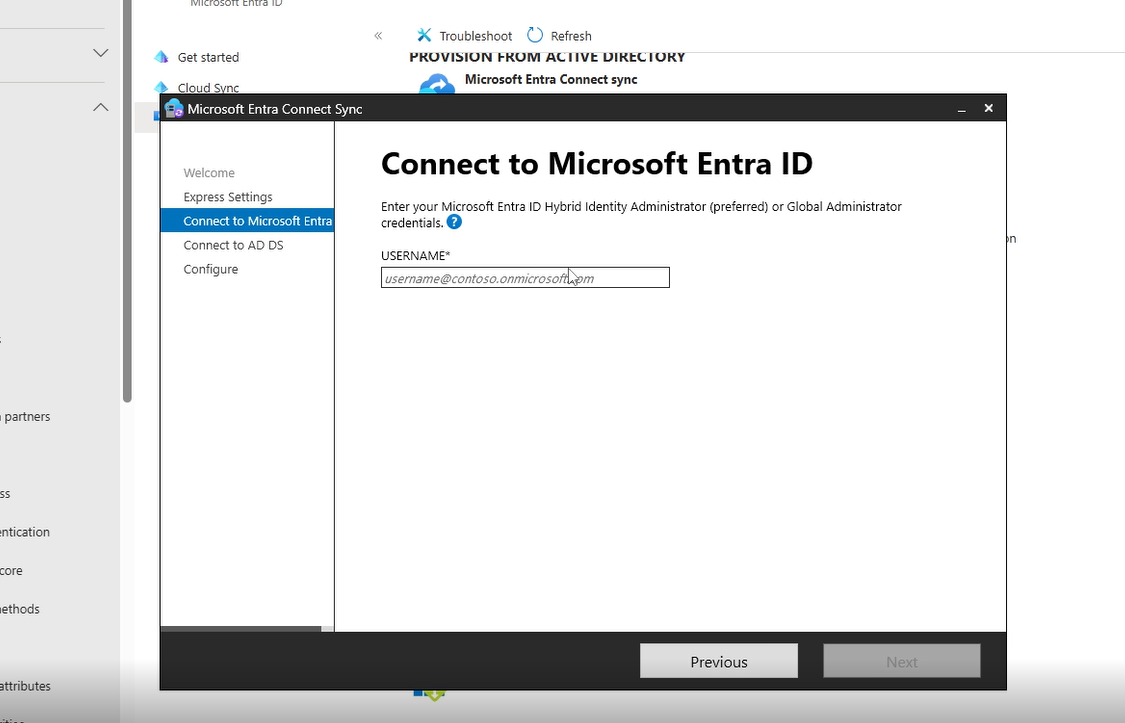
A Menu should pop up with two options (Configure and use Express settings). Choose use express settings and press next. The window above should show up, enter your Azure portal email address in (this is the account you have registered for Azure) and press Next.
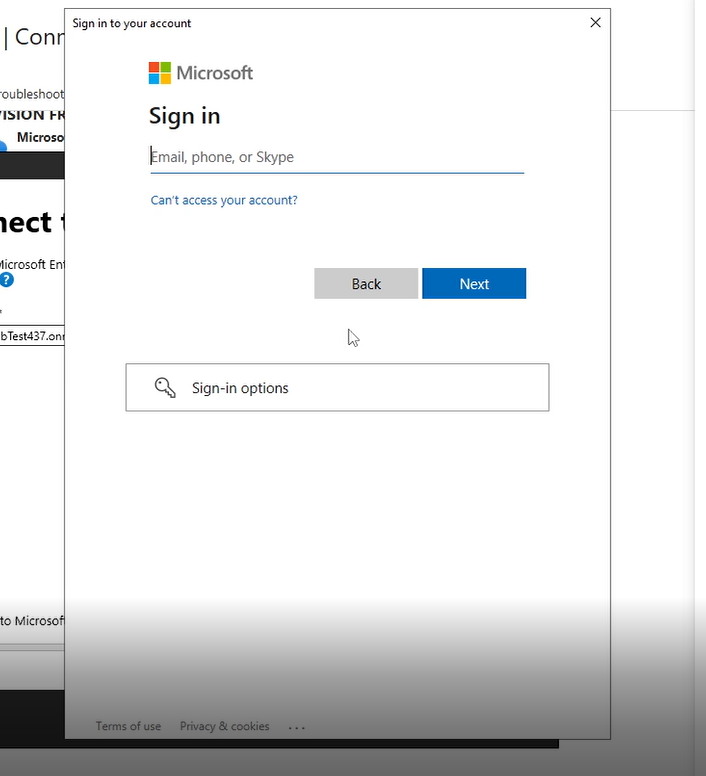
Once done, press next and a window should pop up prompting you to enter your details in. Enter your details in and press Next.
(NOTE - You may need to add the website to the safe websites but you will be alerted of this)
Step 4 - Entering your local administrator account
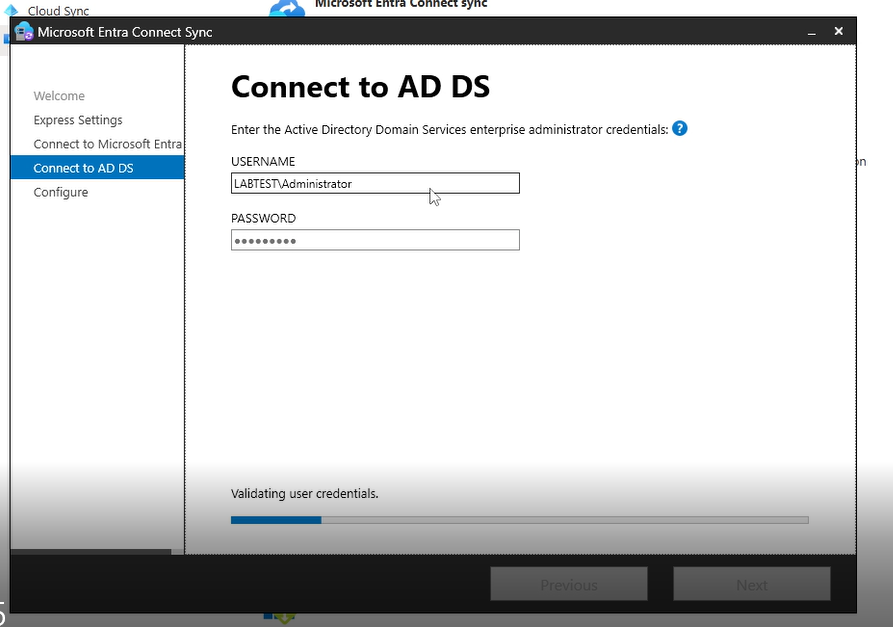
Once the account has been validated, enter the local administrator account username and password. It would be DOMAIN\Administrator_username and password would be the password for the admin account
(In my example it is LABTEST\Administrator)
Step 5 - Microsoft UPN
After the previous step, you may see a message regarding UPN. Small definition below -
UPN - Stands for user principal name and it an internet style login name for a user when signing into Microsoft services such as Azure. Follows a format of username@domain.com
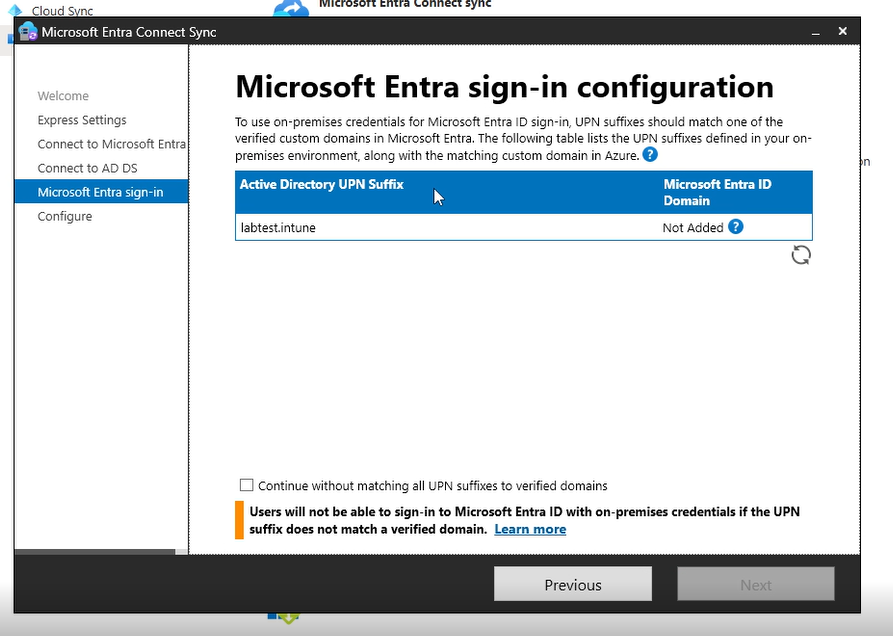
You will see this screen that the Entra ID domain is not added. This means that we have not brought a domain called labtest.intune and for this scenario it is best to press the checkbox to continue without matching all UPN suffixes to verified domains
This means that we will use the .onmicrosoft.com as the domain for example in my case it is ShamasI@Labtest437.onmicrosoft.com. If I had a UPN it would be ShamasI@Labtest.Intune.
Step 6 - Final configuration
Once, the UPN section has been done, press next and then we will see a list of actions that will be completed
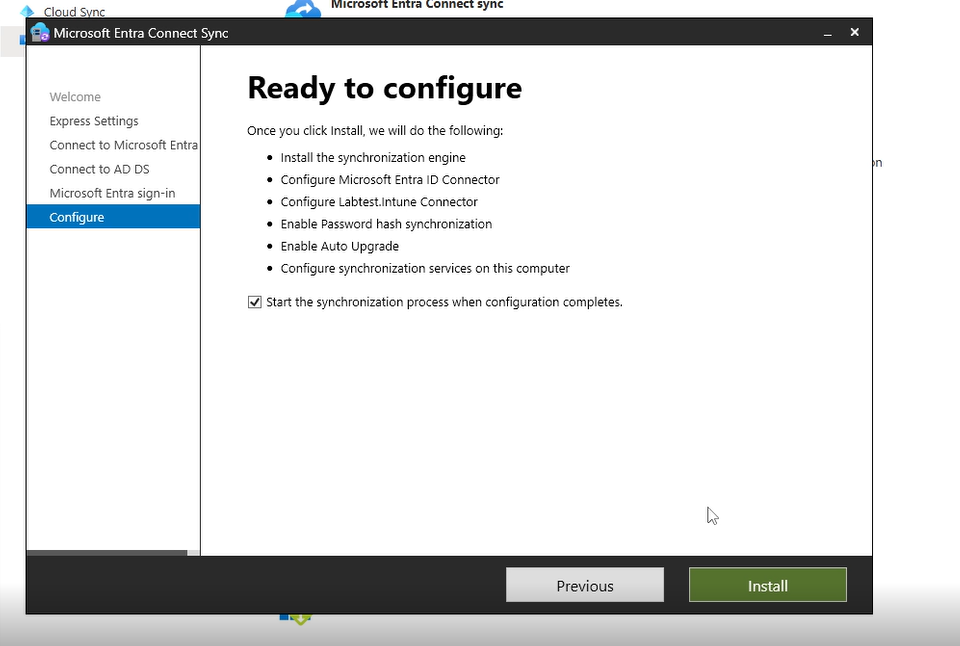
This is the final stage of the process. Once all the configuration has been done, Entra will list all the following actions it will complete as shown below and then click Install. This will install all the components and the window below should show up at the end.
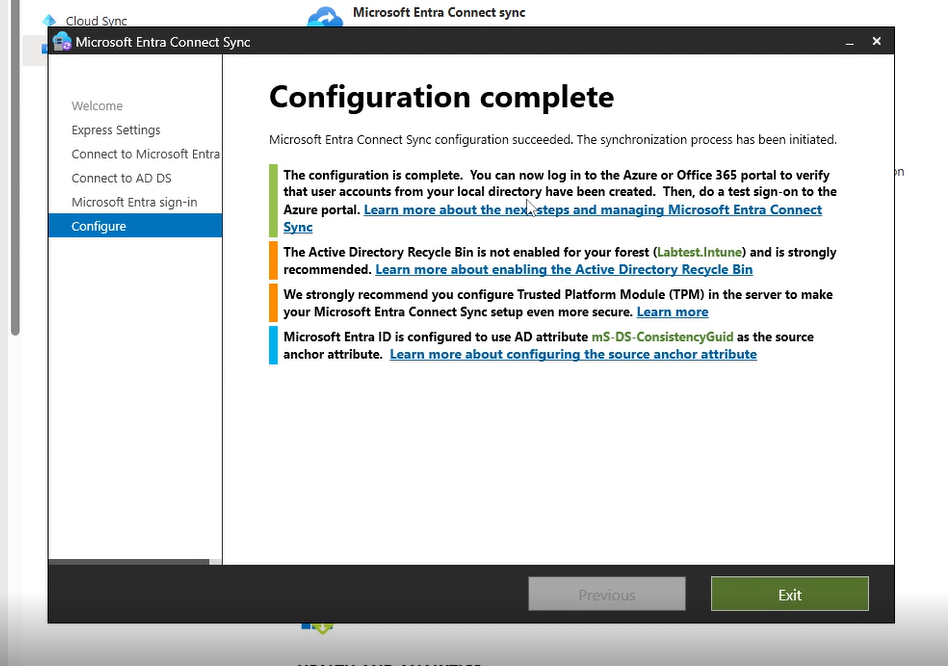
This window will show at the end. TPM is an optional option and enabling recyling bin is something that can be enabled by following the instructions here
Enabling recycling bin - https://learn.microsoft.com/en-us/windows-server/identity/ad-ds/get-started/adac/Advanced-AD-DS-Management-Using-Active-Directory-Administrative-Center--Level-200-#ad_recycle_bin_mgmt
Section 7.5 Video Tutorial
Section 7.6 Final words
Final words of this blog, an end of another part of the journey. From setting up a VM lab to connecting everything to the cloud. This is only the first phase of what is to come. Now I have set up a DC controller and have showed how to connect this to a lab environment which is actually pretty simple to do.
Next blog will be a focus on something different and on a specific tool called PowerShell. For now I will end the blog on a quote -
A wise man once said - "never quit while you are ahead"
-Shamas