From Lab to Cloud – Setting Up the Client VM: What Could Possibly Go Wrong?

Now the real kicker begins..
Sections
Section 9.1 IntroductionSection 9.2 What will the Client VM be used for?
Section 9.3 Setting up the Hyper-V Client PC
Section 9.4 Installing Windows
Section 9.5 Video tutorial Section 9.6 Final Words
Section 9.1 Introduction
As I say, another week another blog. Lesson 9 has come so quickly to just when I finished writing blog post 1. So blog number 9, I will talk more about setting something physical up and in this case it will be the setup of the client virtual machine. Last blog was more about the theory of PowerShell and how it works but this blog will be focused on setting this up.
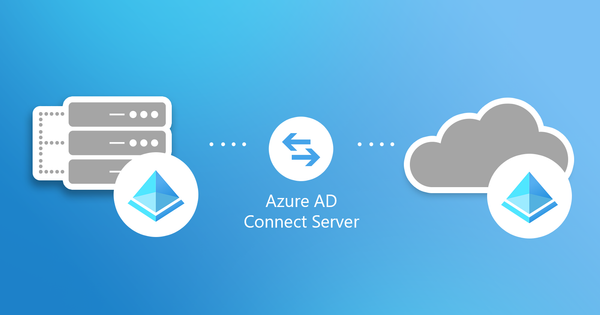
If you recall from blog 2 the start of the mountain, I showed a diagram which I will show below
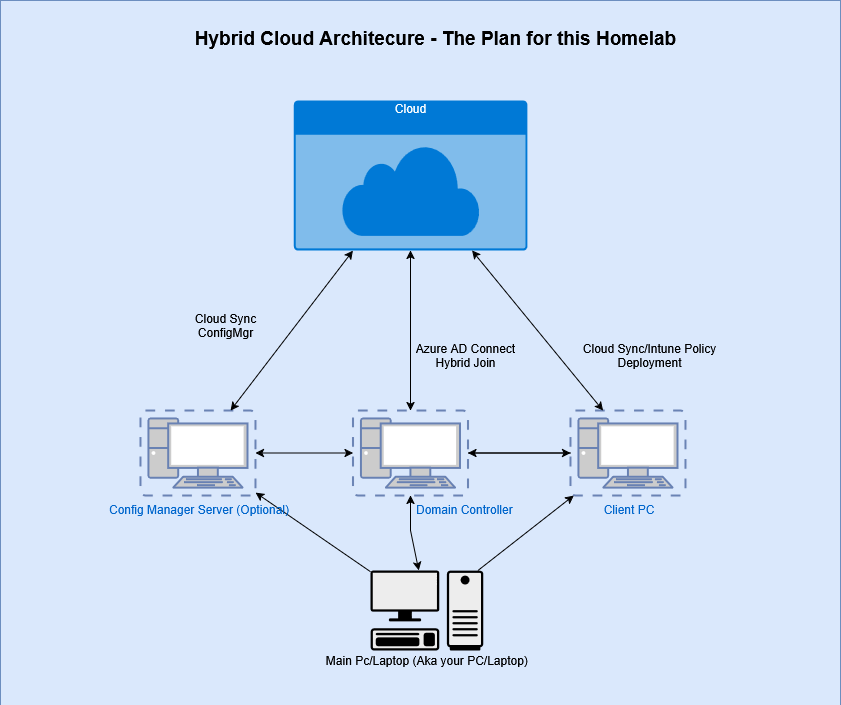
We have set the Domain controller and now it is time to focus on the second VM which is the client PC to almost complete our architecture. Let's get strapped in and I will begin.
Section 9.2 What will the client VM be used for
What will we be using the client VM for?
That is a good question in itself and the answer is pretty simple. We will mainly be using the VM for testing purposes. Let me elaborate further with the diagram below.
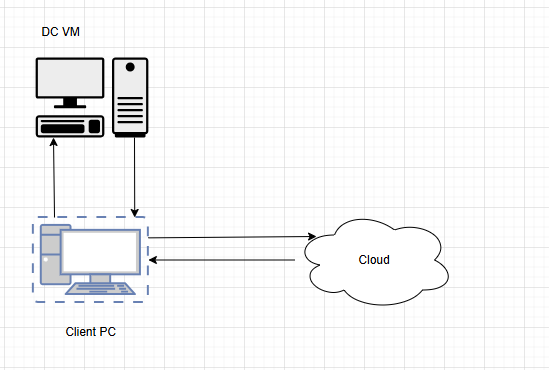
If you have noticed, this is a more stripped down version of the diagram I displayed in the introduction to help me explain my point. The Client PC will be connected to the DC VM as we will need to join the device to the domain (I will explain this further in the next blog). The Client PC will then communicate with the cloud once we assign the device to Intune.
Why though?
This all seems like words right now, but the next few blogs will explain this for my clarity. We will need the client PC to allow us to communicate with the cloud and apply policies such as Bit locker, deployment profiles and much more. This client VM will allow us to test cloud features and create that integration from lab to cloud. Worse case scenario is that the VM gets destroyed but the best thing about this is that we can always recreate this which is why I would recommend setting up a client VM to do all the testing on and to enrol this device into Intune.
That is the simplest reasoning I can give for me creating this client VM. Hopefully it does not catch on fire..
Section 9.3 Setting up the Hyper-V Client PC
In this section, this is where the hands on work will begin. Let me try and show how I would set the Hyper-V up. For those using Oracle virtual box, do not worry I will show the process on how to set this up on Oracle virtual box.
Pre-requisite
First things first, there is an ISO that will need to be downloaded. This is the Windows 11 Enterprise evaluation version. This version is valid for 90 days and this the OS that will be used on the client PC.
Step 1 - Accessing the page
Go to https://www.microsoft.com/en-us/evalcenter/evaluate-windows-11-enterprise and press the download the Windows 11 Enterprise ISO (do not press enterprise LTSC as this is a skimmed down version of Enterprise and features may be missing).
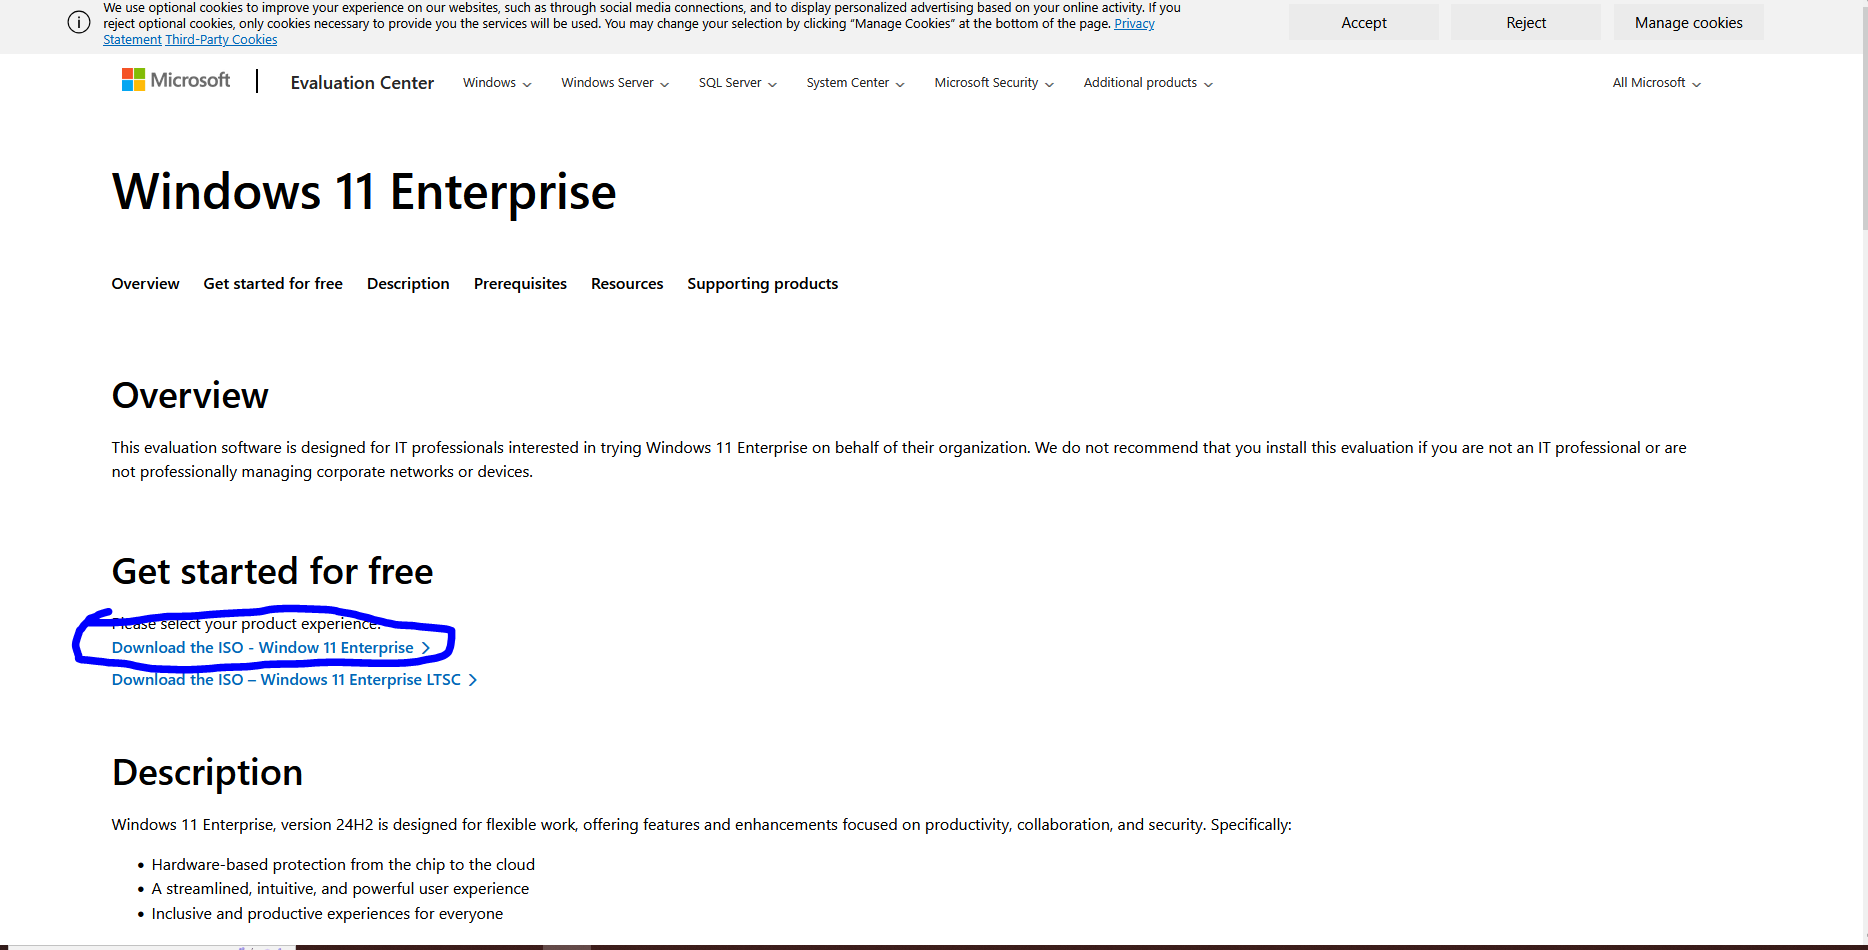
I have attached a screenshot for reference to show how the page looks like and which link to click.
Step 2 - Entering your information
After pressing the link, there will be a page that will ask you to enter some information such as first name, last name etc.
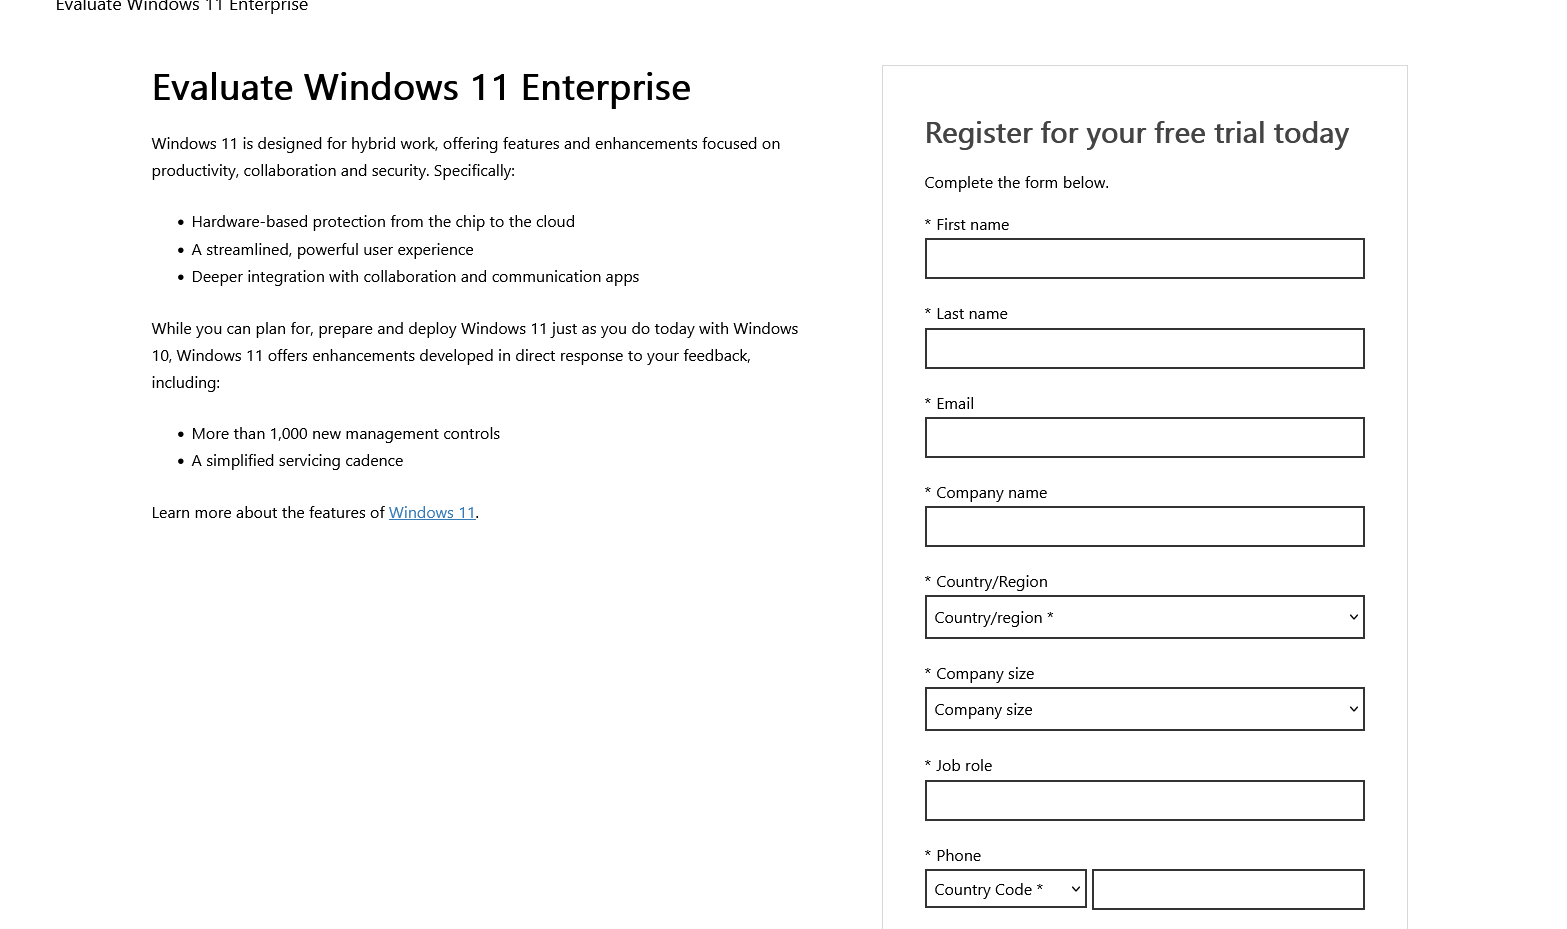
The screenshot above shows the different fields. I would reccomend to put an alt email address or if you are not comfortable, you can put random information in.
(NOTE - I condone abusing this form and to use the ISO for legitimate reasons)
Step 3 - Choosing the ISO to download
The final step would be to choose which version of the ISO to download after entering all that information in the previous step.
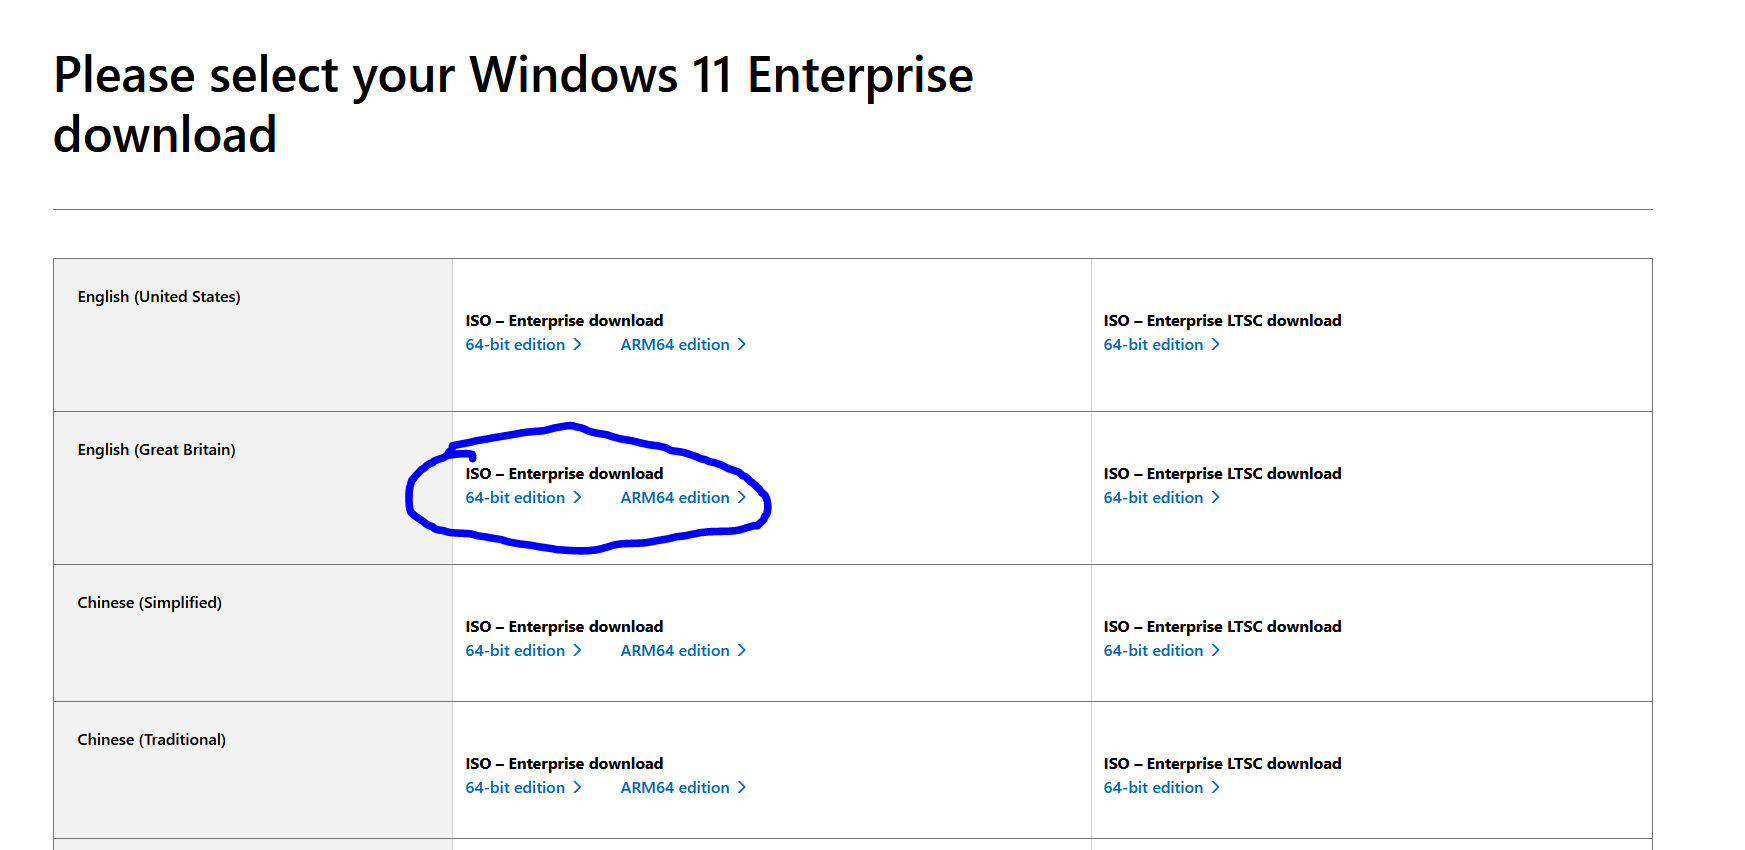
I would choose the GB version if you are from the UK since it would be easier for the keyboard to translate over.
Now onto the next stages, setting up the Hyper-V/Oracle virtual box client
Hyper V setup
First I will start off with Hyper-V and this will be a simple process. Hopefully should not catch on fire..
Step 1 - Starting the process of creating a new virtual machine
First step, lets try and start the process of creating a new VM. Open Hyper-V manager, right click your PC name, press new and then click virtual machine.
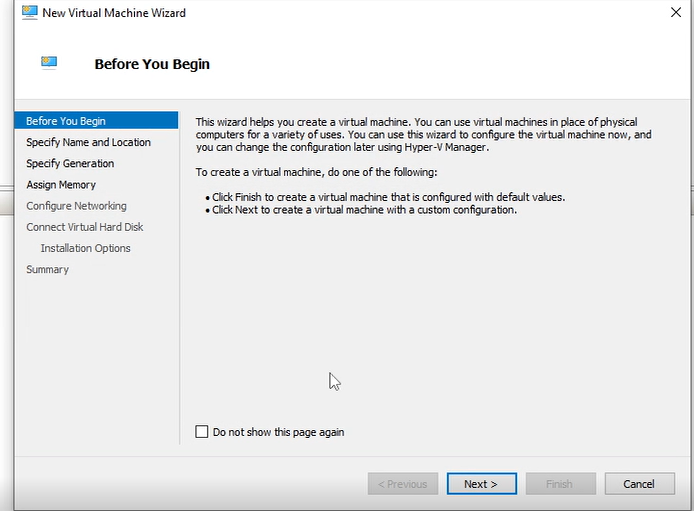
This page will pop up. Press next and let me move onto step 2.
Step 2 - Name and location of the Virtual machine
Next step is a much simpler step. What do we name the VM and how do we store it?
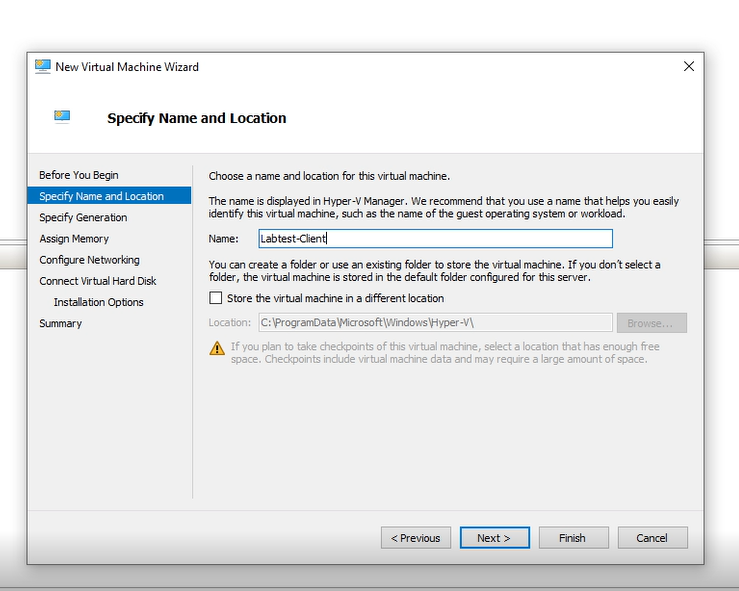
According to the screenshot, I would reccomend giving this VM a relevant name for example in my case I named my VM as Labtest-Client. The second option to "Store the virtual machine in a different location" only applies if you have another SSD or an external hard drive and you want to store it there. For me this does not matter and press next when you have configured the options.
Step 3 - Other options
Step 3 is the other options and I will break this down in a more simple way
Specifiy Generation - Choose generation 2 (IN MY VIDEO I MAY HAVE PRESSED GENERATION 1 , PLEASE IGNORE THIS)
Assign memory - 4000 MB (4GB) (Can do 3000 MB if you have a lower spec device)
Configure networking - Choose the same switch that you use for your DC VM
Connect virtual hard disk - Change Size between 80-120GB
Configure the above settings and you should be on the on the Installation options menu which I will explain in the below step.
Step 4 - Installation Options
Now Step 4, choosing how we install the Operating system. If you have followed the pre-requisite, the ISO should have been downloaded on your PC.
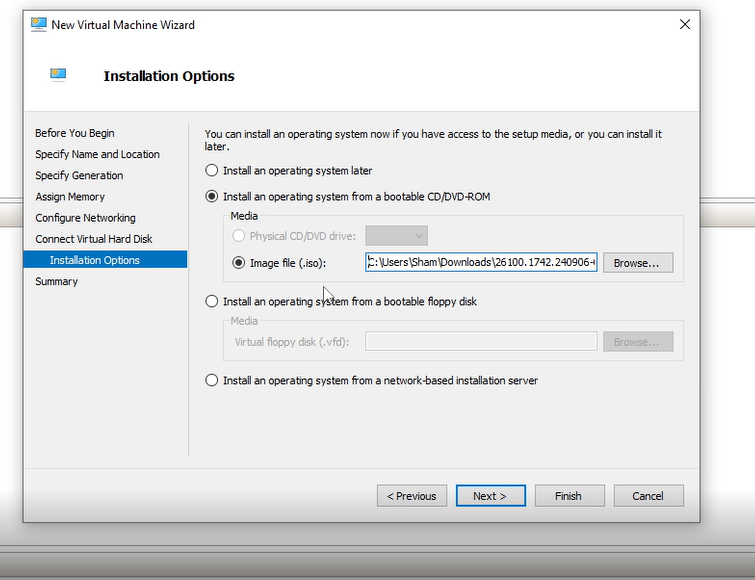
As the screenshot above shows, there are different options to choose.
The steps to follow would be Install an Operating system checkbox -> Image file .iso -> Choose the folder where you have saved the ISO and click the ISO file -> press next and that should be perfect.
Step 5 - Summary
The final step of this section. The summary will show up which will show all the options that show up. Press finish and the VM should be created.
Oracle VirtualBox
Now onto Oracle VirtualBox. Hyper-V is only available on Windows 11 Pro so I have added a guide on how to set this up for Oracle VirtualBox as well.
Step 1 - Starting the process of creating a new virtual machine
First things first, open Oracle virtualbox and you should see a star logo that says new. I will attach a screenshot below for reference.
Step 2 - Entering name and operating system
Second step would be entering the name of the VM and the operating system. This is a critical step and I would reccomend you to name the VM a suitable client name like Labtest-Client and make sure you have the Windows 11 ISO from the pre-requsite section installed
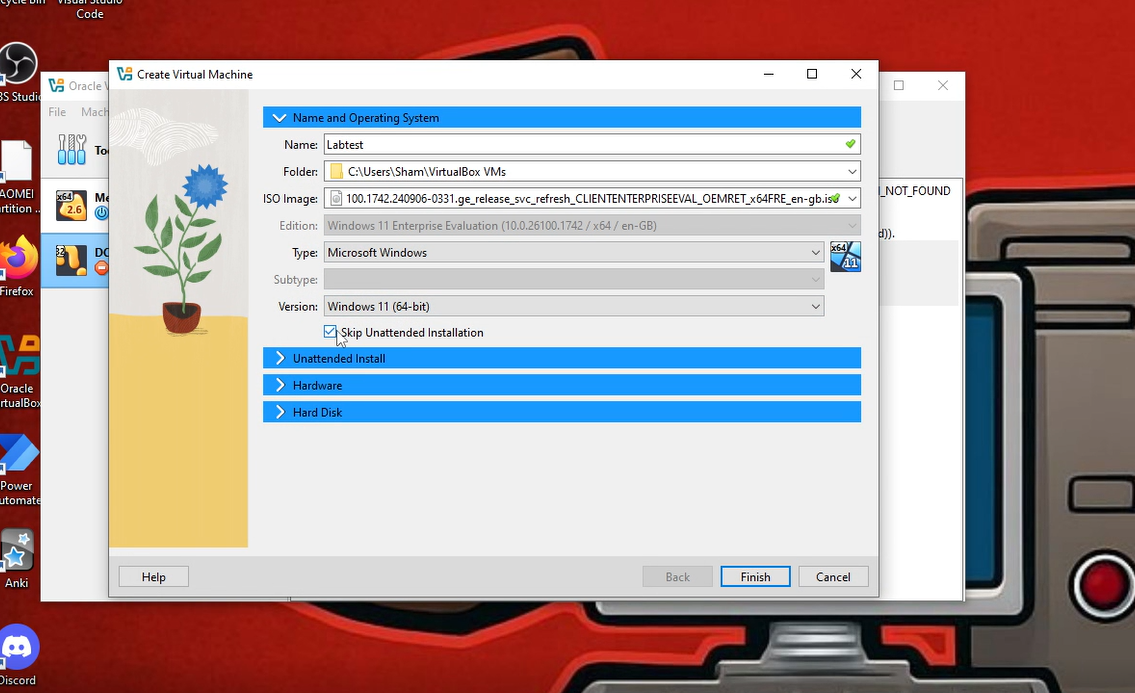
I have added a screenshot for reference and in this case I have named client Labtest (not the best name but I will be using Hyper-V for this).
The folder option is where the VM is stored and if you have an external hard drive or an0ther SSD, you can move the virtual disk there
The ISO image will be Windows 11 enterprise ISO. Make sure you press the folder icon and go to the folder where you have saved it.
Make sure to click skip unattended installation as we will be setting this up from the base.
Step 3 - Hardware and Hard disk
This step is much simpler as all I need to do configure the hardware and the hard disk.
For the hardware - Put 4000MB and select 2 CPUS (If you have a lower spec device then you can put in 3000MB and 1 CPU). Make sure to uncheck enable EFI as we will not require this option
For the hard disk - Change the size between 80-100 GB and make sure the VM is saved in the correct place. You can change this by pressing the folder icon.
Once above settings have been configured, press finish and the VM should be created.
Step 4 - Network settings
Final step would be network settings. I will attach a screenshot below for better clarity regarding this.
Right click the newly created VM and press settings. Go to the network tab and configure the settings as below
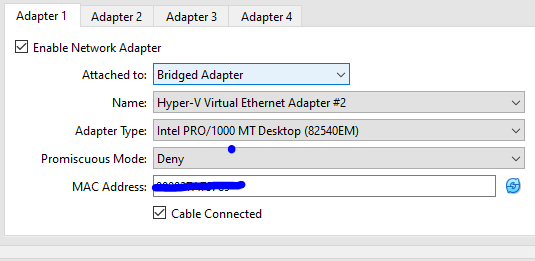
Attached to - Bridged Adapter
Name - Make sure this is your WIFI adapter for example Intel AX etc or if you are using Ethernet, it may be Intel Ethernet
Adapter type - Leave this as Intel PRO
Promiscuous Mode - Deny
Cable connected - Leave this checked
Simple stuff then press ok and the network should be configured.
Now we have set up the Oracle Virtualbox version. Simple to do and that leads up to the next section which is installing Windows.
Section 9.4 Installing Windows
Now the biggest section of them all, Installing Windows 11 enterprise.
Step 1 - Enabling TPM (Trusted Platform module)
Step 1 would be enabling trusted platform module and I will explain how to do this for Hyper-V (Oracle Virtualbox will have this enabled by default)
Right click the VM and press settings -> Go to the security box and there should be a check box that says "Enable Trusted Platform Module".
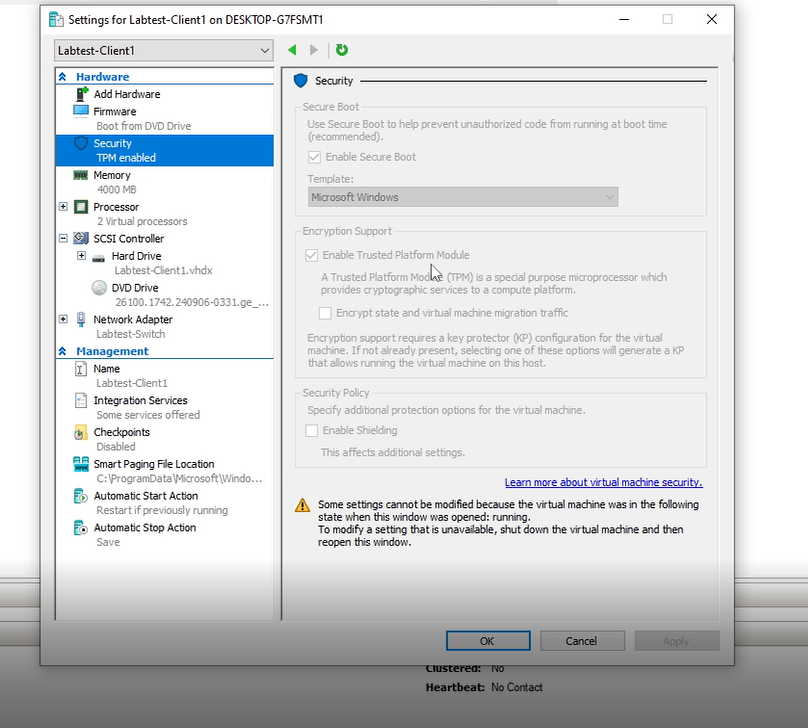
Check the TPM checkbox and then press apply.
Why do we need to enable this?
The reason for this is that Windows 11 requires TPM to be present on the device you are installing Windows on as part of the new security baseline that Windows 11 has.
Step 2 - Starting the VM up
Now TPM has been up, it is time to start the VM. Right click and press connect, then press start (for virtual box you can double click it). You may need to press any key on your keyboard to begin the installation.
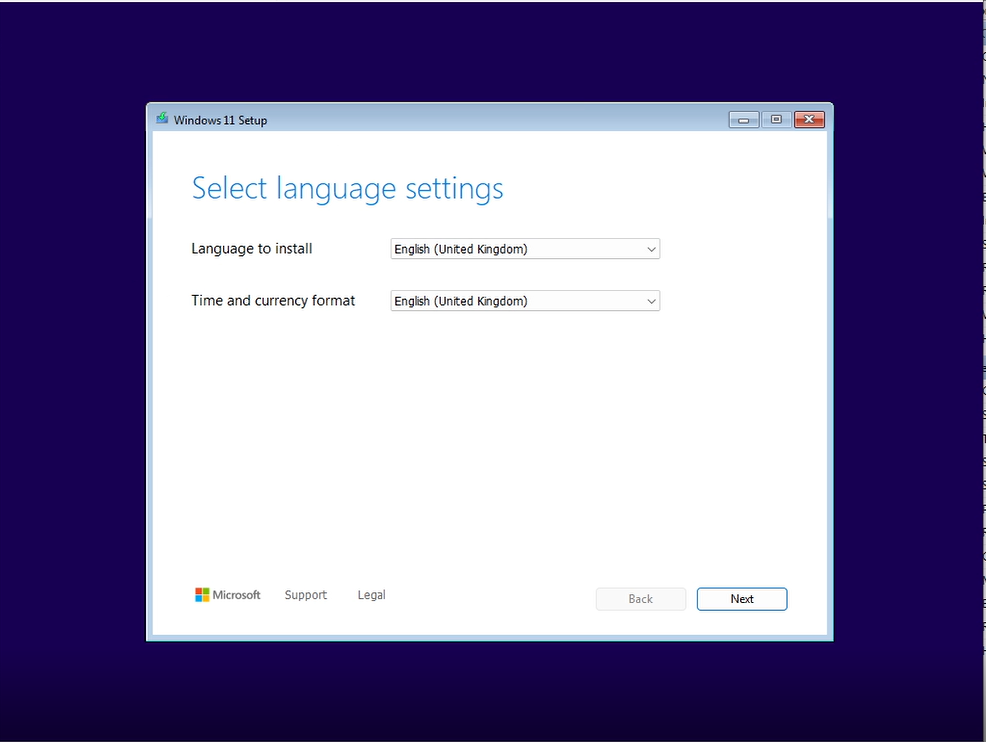
The page above should show up. Press next and then it will ask for a keyboard layout. Keep this as English and then press next.
Step 2 - Selecting Setup Option and choosing the correct disk
Once you press next, the screen below should show up.
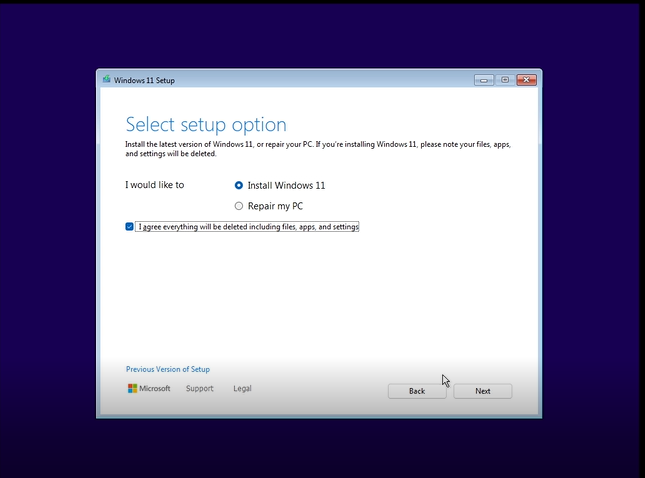
Press Install Windows 11 and make sure to check the checkbox and then finally press next. Windows will check your PC and if an error shows up saying your PC does not meet the requirements, please read the note below.
NOTE - Make sure your VM has TPM enabled and has two virtual processors assigned
Once the check is done, accept the terms and conditions and the disk selection page should show up. Press disk 0 and press next. Once next is pressed, Windows will start installing.
NOTE - This will take 10-15 minutes to install
Step 3 - Setting up Windows
Once Windows has installed, you should receive the below screen.
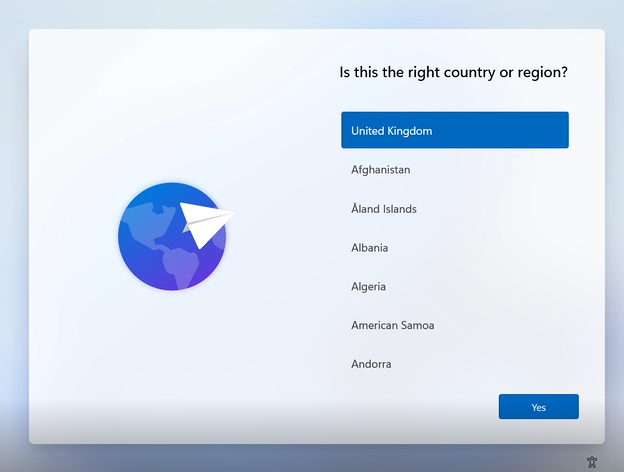
I would choose the correct region and in my case it is United Kingdom and press next. Then choose the keyboard layout as United Kingdom and press next and then finally skip adding the second layout. Press next and Windows will do it's initialisation phase which can take 10 minutes and your VM may restart (A longgg time i know right).
Step 4 - Setting up an account
That was a long wait but now I am almost done. It is time to setup an account but we will need to create a local account. First step would be to press sign in options and press domain join.
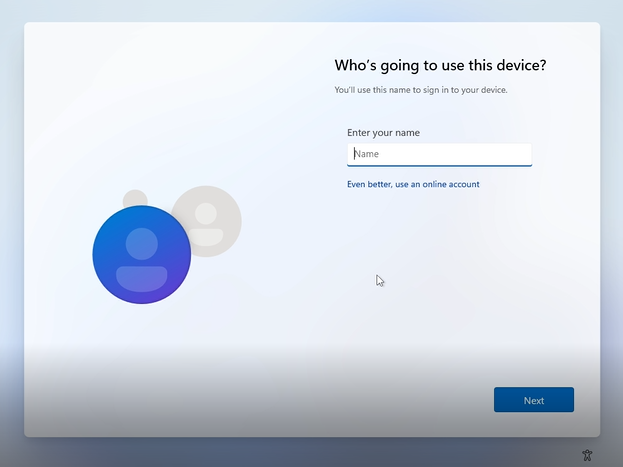
The above screenshot shows an example. Enter a local account name such as test or your name. Press next and enter a password for the local account. Once a password has been set, press next and fill in the security questions (I know but Microsoft just loves forcing extra options).
Once done, press no to diagnostic options and locations and Windows should start downloading and installing as shown below
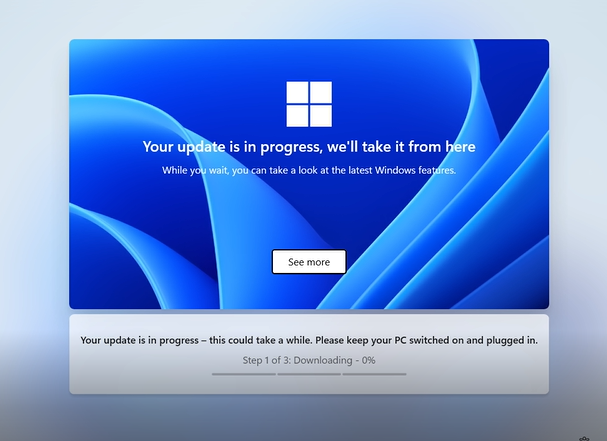
This process is long so I would reccomend to relax and take a break.
Step 6 - The Final step (I swear this is the final step)
Once Windows has been downloaded and installed, the below screen should show up.
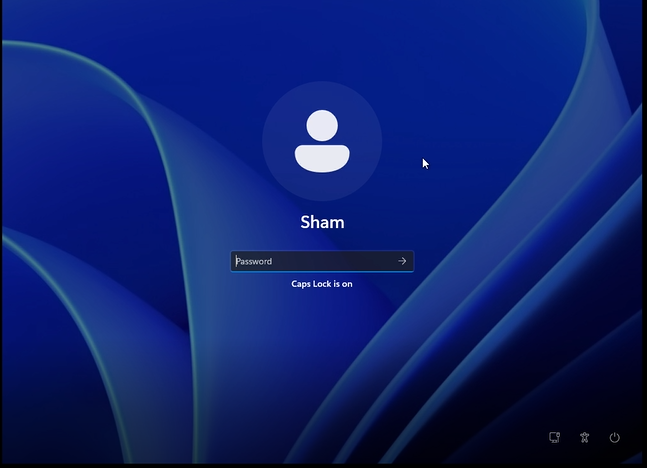
The login page should show up and enter the password you set up at the local account setup and press enter. After Windows will do last minute setup which should take around 3-5 minutes. Once done, Windows should look like below.
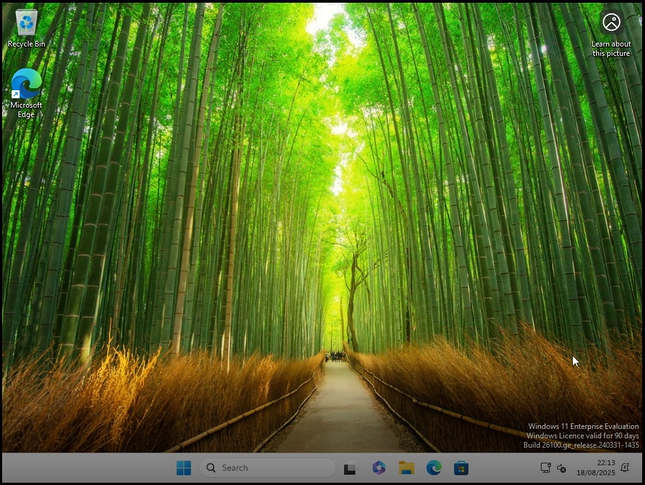
When this Windows shows up, that means you have finally made it. Windows is finally set up and I will 100% make a video tutorial of this for easy setup. But what a journey it has been.
Section 9.5 Video tutorial
Section 9.6 Final words
The final chapter of this blog, what a ride it has been. I know it is a bit late of me typing this and posting this but life gets busy. However, as I said this blog will never die. But each week I will present something new and more good things will come.
I will end on a quote - A wise man once said “Stay proactive in your free time and the rewards you shall reap”.
-Shamas